Windows supports two main types of bitmap: Device-Independent Bitmaps (DIBs) and Device-Dependent Bitmaps (DDBs).
A Device-Independent Bitmap (DIB) stores image information in a standardised format that is independent of a particular display device. The bitmap contains information describing its colour format and pixel layout, allowing the image data to be transferred between different devices and applications without depending on the characteristics of a specific graphics device.
DIBs are commonly used when bitmap data needs to be stored in files, transferred through the clipboard, or exchanged between applications. The Windows .BMP file format is a common example of a file containing DIB data.
A Device-Dependent Bitmap (DDB), on the other hand, is created in a format that is compatible with a particular device context. Its colour representation and pixel organisation are determined by the target graphics device. This makes DDBs particularly useful for efficient drawing through the Windows Graphics Device Interface (GDI).
For example, a bitmap created with CreateCompatibleBitmap() is a DDB whose format is compatible with the specified device context. A bitmap loaded from a .BMP file can be represented as DIB data and can subsequently be converted or copied into a device-dependent bitmap for efficient display.
In practice, Windows applications often work with DIB data when portability is important and use DDBs when efficient GDI rendering is required. This provides a useful combination of portability and display performance.
Creating and Loading Device-Independent Bitmaps
Device-independent bitmap data can be created using an image editor or loaded from a bitmap file. In a Win32 application, the LoadImage() function can be used to load bitmap resources or bitmap files. It supersedes the older LoadBitmap() function for many bitmap-loading scenarios.
The prototype of the ANSI version of the function is:
HANDLE LoadImageA(
    HINSTANCE hInst,
    LPCSTR    name,
    UINT      type,
    int       cx,
    int       cy,
    UINT      fuLoad
);
The parameters are:
- hInst – A handle to the module containing the image resource. When loading an image from a file, this can normally be
NULLwhenLR_LOADFROMFILEis specified. - name – The name or resource identifier of the image to load. When loading an image from a file, this specifies the filename.
- type – Specifies the type of image being loaded, such as
IMAGE_BITMAP,IMAGE_ICON, orIMAGE_CURSOR. - cx – The desired width of the image. For a bitmap, this parameter can be used to specify the requested width.
- cy – The desired height of the image.
- fuLoad – Flags controlling how the image is loaded. Common flags include
LR_CREATEDIBSECTION,LR_DEFAULTCOLOR,LR_DEFAULTSIZE,LR_LOADFROMFILE,LR_LOADMAP3DCOLORS,LR_LOADTRANSPARENT,LR_MONOCHROME,LR_SHARED, andLR_VGACOLOR.
If the function succeeds, it returns a handle to the loaded image. If the function fails, it returns NULL.
For further reading, see the Microsoft documentation for LoadImage().
When a bitmap is loaded using LR_CREATEDIBSECTION, Windows creates a DIB section, which provides access to the bitmap's pixel data while also allowing the bitmap to be selected into a device context for drawing.
A DIB can also be converted or used to create a device-dependent bitmap. Functions such as CreateDIBitmap() can be used when a bitmap compatible with a particular device context is required.
Microsoft Learn: CreateDIBitmap
Displaying Bitmaps
To display a bitmap using the Windows Graphics Device Interface (GDI), two device contexts (DCs) are commonly involved. The first is the window device context, which represents the drawing surface of the application window. The second is a memory device context, which provides an off-screen drawing surface for temporarily holding and manipulating the bitmap.
The memory device context is created using CreateCompatibleDC(). It is compatible with an existing device context and can therefore be used with bitmap objects designed for that device.
Once the memory DC has been created, a bitmap is selected into it using SelectObject(). The bitmap then becomes the drawing surface associated with the memory DC.
The bitmap can subsequently be copied from the memory DC to the window DC using BitBlt(). This performs a fast block transfer of pixels between the two device contexts.
Using an off-screen bitmap in this way can also form the basis of double buffering, where the complete image is prepared in memory before being copied to the screen.
The typical sequence of operations is:
- Obtain the window's device context using
BeginPaint()orGetDC(). - Create a compatible memory device context using
CreateCompatibleDC(). - Load or create a bitmap.
- Select the bitmap into the memory device context using
SelectObject(). - Copy the bitmap to the window using
BitBlt(). - Restore the original bitmap in the memory device context.
- Delete the memory device context using
DeleteDC(). - Release the window device context using
EndPaint()orReleaseDC(), as appropriate.
DC = GetDC(hwnd);
memDC = CreateCompatibleDC(DC);
oldBitmap = SelectObject(memDC, bitmap1);

BitBlt(
    DC,
    x, y,
    cx, cy,
    memDC,
    x1, y1,
    SRCCOPY
);

SelectObject(memDC, oldBitmap);
DeleteDC(memDC);
ReleaseDC(hwnd, DC);
The syntax for CreateCompatibleDC() is:
HDC CreateCompatibleDC(HDC hdc);The hdc parameter is a handle to an existing device context. If hdc is NULL, Windows creates a memory DC compatible with the application's current screen.
If the function succeeds, it returns a handle to the newly created memory device context. If it fails, it returns NULL.
The syntax for BitBlt() is:
BOOL BitBlt(
    HDC   hdc,
    int   x,
    int   y,
    int   cx,
    int   cy,
    HDC   hdcSrc,
    int   x1,
    int   y1,
    DWORD rop
);
The parameters are:
- hdc – A handle to the destination device context.
- x – The x-coordinate of the upper-left corner of the destination rectangle.
- y – The y-coordinate of the upper-left corner of the destination rectangle.
- cx – The width of the source and destination rectangles.
- cy – The height of the source and destination rectangles.
- hdcSrc – A handle to the source device context.
- x1 – The x-coordinate of the upper-left corner of the source rectangle.
- y1 – The y-coordinate of the upper-left corner of the source rectangle.
- rop – A raster-operation code specifying how the source pixels are combined with the destination pixels.
The most commonly used raster-operation code is SRCCOPY. This copies the source pixels directly to the destination.
BitBlt() returns a non-zero value if the operation succeeds and zero if it fails.
For further information, see the Microsoft documentation for BitBlt().
When a bitmap is no longer required, it should be released using the DeleteObject() function. GDI objects should only be deleted after they have been removed from any device context in which they are currently selected.
Repainting the Screen Using Device-Dependent Bitmaps
One technique for preserving the contents of a window during repaint operations is to use a device-dependent bitmap (DDB) as an off-screen drawing surface. Instead of drawing directly to the window, the application performs its drawing operations on a bitmap held in memory.
The off-screen bitmap acts as a back buffer or virtual drawing surface. It maintains a completed representation of the window's client area, allowing the application to copy the image to the screen whenever the window needs repainting.
The bitmap is associated with a memory device context created using CreateCompatibleDC(). A compatible bitmap can then be created using CreateCompatibleBitmap() and selected into the memory DC.
When Windows generates a repaint request, for example after a window has been uncovered, resized, or restored, the application can copy the contents of the off-screen bitmap to the window's device context using BitBlt(). This avoids repeatedly rebuilding the entire image and can significantly reduce flicker.
The sequence of operations is as follows:
- Create a memory device context using
CreateCompatibleDC(). - Create a compatible bitmap using
CreateCompatibleBitmap(). - Select the bitmap into the memory device context using
SelectObject(). - Perform drawing operations on the memory device context.
- When a
WM_PAINTmessage is received, copy the completed bitmap to the window device context usingBitBlt(). - Restore the original bitmap and release the GDI objects when they are no longer required.
This technique is commonly referred to as double buffering. By drawing the complete image off-screen and then copying it to the display in a single operation, applications can produce smoother graphics and reduce visible flickering.
Creating Device-Dependent Bitmaps
The API function CreateCompatibleBitmap() creates a bitmap that is compatible with a specified device context. It is commonly used when creating colour bitmaps for use with a memory DC.
HBITMAP CreateCompatibleBitmap(
    HDC hdc,
    int cx,
    int cy
);
Where:
- hdc – A handle to a device context whose characteristics are used to create the bitmap.
- cx – The width of the bitmap in pixels.
- cy – The height of the bitmap in pixels.
If the function succeeds, it returns a handle to the compatible bitmap. If it fails, it returns NULL.
A device-dependent bitmap can also be created directly with the CreateBitmap() function. This function is particularly useful when creating monochrome or explicitly specified bitmap formats.
HBITMAP CreateBitmap(
    int nWidth,
    int nHeight,
    UINT nPlanes,
    UINT nBitCount,
    const VOID *lpBits
);
Where:
- nWidth – The width of the bitmap in pixels.
- nHeight – The height of the bitmap in pixels.
- nPlanes – The number of colour planes.
- nBitCount – The number of bits used to represent each pixel.
- lpBits – A pointer to the initial bitmap pixel data. This can be
NULLwhen no initial pixel data is supplied.
If the function succeeds, it returns a handle to the bitmap. If it fails, it returns NULL.
Example
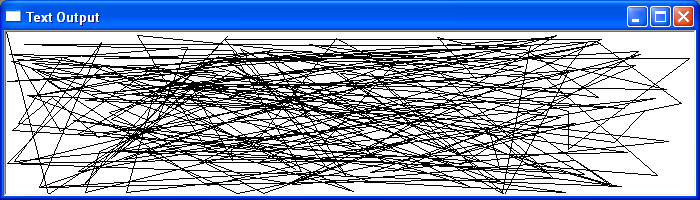
In the example below, Windows creates a device context for the application window together with a compatible memory device context. The application creates an off-screen bitmap and draws a series of random lines onto it.
When Windows sends a repaint request, the contents of the off-screen bitmap are copied to the window's device context using BitBlt(). Because the complete image has already been prepared in memory, the application can repaint the window without having to recreate every line individually.
Copying a Bitmap Using the StretchBlt Function
The StretchBlt() function copies pixels from a source device context to a destination device context while scaling the image to fit the specified destination rectangle. If the destination rectangle is larger than the source rectangle, the image is enlarged. If it is smaller, the image is reduced.
Unlike BitBlt(), which performs a direct pixel transfer without changing the dimensions of the source image, StretchBlt() performs scaling during the transfer. This makes it useful when an image needs to be displayed at a different size.
For example, an application can capture the contents of the Windows desktop into a compatible bitmap and then display that captured image inside its client area. StretchBlt() can automatically scale the captured desktop image to match the size of the application window.
A screen capture can be initiated when the user clicks the left mouse button within the application's client area. After the desktop image has been captured, the application can repaint its window using the stored bitmap whenever a repaint request is received.
The basic sequence of operations is:
- Obtain the screen device context using
GetDC(NULL). - Create a compatible memory device context using
CreateCompatibleDC(). - Create a compatible bitmap using
CreateCompatibleBitmap(). - Copy the desktop image into the memory bitmap using
BitBlt(). - Release the screen device context after the capture has been completed.
- When a
WM_PAINTmessage is received, useStretchBlt()to copy and scale the bitmap into the application's client area. - Restore the original bitmap and release the GDI resources when they are no longer required.
Note: StretchBlt() performs its scaling according to the current stretch mode. The application can select the required mode using SetStretchBltMode(). Modes include COLORONCOLOR, HALFTONE, and others, with HALFTONE generally providing higher-quality results when reducing images.
Example
In the example below, the application captures the current contents of the Windows desktop by creating a bitmap compatible with the screen device context. The captured image is copied into a memory bitmap and subsequently displayed in the application window using StretchBlt().
When the user clicks the left mouse button within the application window, a new screen capture is made. The captured bitmap is then scaled to fit the client area whenever the window receives a repaint request.
When working with GDI bitmaps, it is important to remember that device contexts and GDI objects are system resources. The application should restore previously selected objects before deleting a bitmap or device context and should release each resource when it is no longer required.